There are 3 types of TM1 Application, below is the description based on TM1 Applications Guide (link):
1. Responsibility
An ongoing, rolling type of workflow with review and edit rights that is typically used for sales planning. This type of application requires an approval hierarchy but does not use submission or locking of data since data entry is ongoing, with no fixed deadline
2. Central
A workflow designed to manage central assumption data needed to maintain the applications. In these types of applications the data is typically controlled by corporate level users instead of sales or contributor users and often contains data such as price, cost, and merit increase.
3. Approval
A bottom-up, submission-based workflow with review, edit, and submit rights. Typically these applications use current data with a fixed time scale to complete and offer the ability to lock the data after submission. Taking ownership is required in an approval-based application.
Below are the steps to create TM1 Approval Application.
In Performance Modeler click Application Design, Right-click the Applications folder, point to New, and then click Application.

Type in the name for the new application and select Application Type Approval

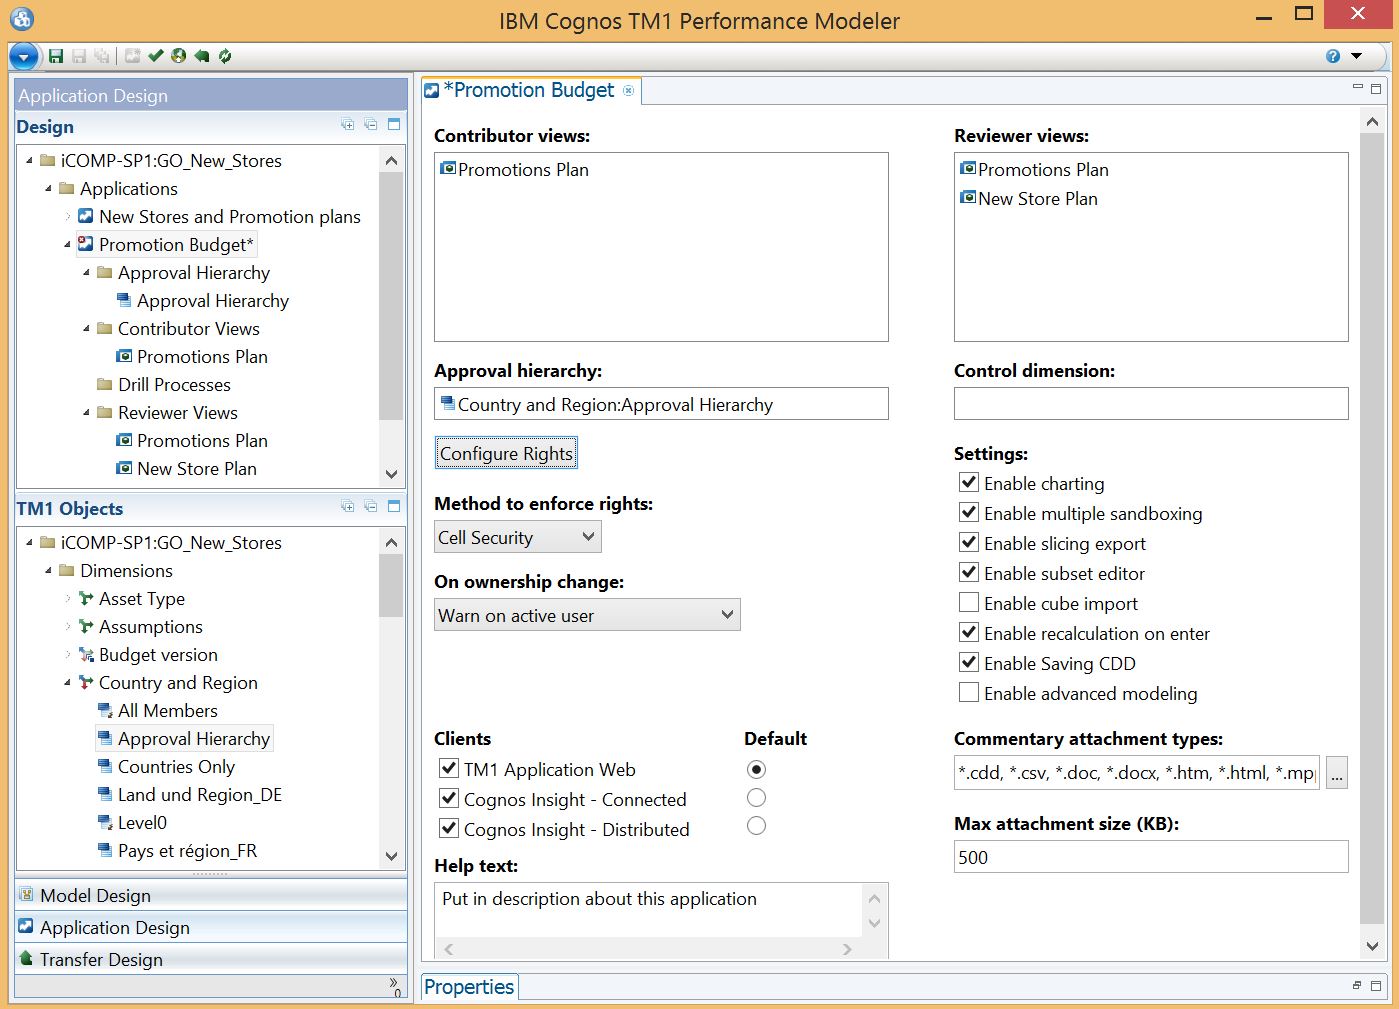
To set up the applications, drag object from TM1 Objects pane on left side and drop it to desired section in right side. In this example we give both contributor (the person who inputs/creates the budget) and the reviewer same view. We can give Reviewer additional view for additional information.

Drag and drop the subset to be used as Approval hierarchy. This will determines the workflow of the application. In this example we are using Country and Region dimension subset.
Also in this page you can set up what clients that can be used by the user and what is the default client.
On the toolbar, click Validate Application ![]() and click Save, and then click OK. Click Deploy Application
and click Save, and then click OK. Click Deploy Application![]()
In the right pane, click the Configure Rights button. In the Rights Editor select a node in the hierarchy, then the corresponding group, and finally the rights to apply. Click Add and that setting will be added to the list at the top.
For more information on application rights refer to here.
We can assign same node to two different groups with different right, for example below group 1 will be able to submit the budget and while group 2 will only be able to edit.

Assign all nodes to appropriate groups.
The Review Depth determines how many levels beneath the current node will inherit the selected access right. If you want only the immediate children of the current node to inherit rights, select 1. If you want the two levels beneath the current node to inherit rights, select 2, and so on. Similarly the View Depth is applicable for view visibility.

Open IBM Cognos TM1 Applications portal. To the right of the application, click Activate the IBM Cognos TM1 Application icon ![]() .
.

The result:
